Make your own motion illusion (in Python)
Published:
I’m going to show you how to make your own four-stroke apparent motion illusion!
“What on earth is four-stroke apparent motion?”, I hear you say.
It’s this mind-melting (and, after staring for a while, potentially stomach-churning!) effect:
What’s amazing is that this effect is generated by presenting just two (!) images again and again (so the illusion lasts more than a few milliseconds 😎) and inverting their luminance profiles with each repetition (hence four-stroke, since it’s essentially a four image sequence). Thats all it takes… kinda wild!
I won’t go into the specifics of why this gives rise to the perception of never-ending motion, but it relates to my previous post on motion energy filtering and there are several interesting papers on the topic (if you’re familiar with motion energy filtering then Figure 1 of the paper by Mather & Murdoch should help your intuition!).
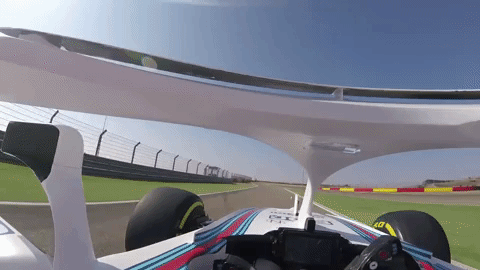
So, how can you make your own version of this effect? First you need to go find a gif that contains interesting motion! The one I used for the demo above looked like this:
Then, it turns out that you can open gifs in preview (sorry non-mac users, I’m sure there is a very simple windows equivalent… but I’m not going to google it) and get at the individual frames. Having done so, all you need to do is pick two sequential (or there abouts…) frames from your gif, where there is interesting motion happening. Export the two frames as images (.tiff is fine), naming the first ‘img1’ and the second ‘img2’ (easiest way is to just drag and drop the relevant frame and then rename it).
(Note, I also desaturated the images in preview… you don’t strictly have to do this, but if you don’t then be warned that things will look kinda hectic when you invert the image colour profiles!)
Now here’s the code I used to actually generate the demo (which you can easily run too, so long as you have psychopy installed).
from psychopy import visual, core

#create a window
win = visual.Window(fullscr = False, size = (800,800), units = 'pix', screen = 1)

im1 = visual.ImageStim(win, image='img1', size = 800)
im2 = visual.ImageStim(win, image='img2', size = 800)

for i in range(2):

    for i in range(3):

        im1.draw()
        win.flip()
        win.getMovieFrame(buffer='front')

    for i in range(3):

        im2.draw()
        win.flip()
        win.getMovieFrame(buffer='front')

    im1.color *= -1
    im2.color *= -1

win.saveMovieFrames(fileName='f1_headache.gif', fps = 60) # save movie

win.close()
core.quit()
There are obviously myriad other ways to do this (e.g., with imageio), so here’s the essential logical steps: 1) You need to load the images, 2) present them for a few frames (I chose 3 arbitrarily, fewer frames give a more flicker-y vibe), 3) invert the luminance/colour profiles and present them again. Oh and you also need a way of saving the frame buffer with each screen refresh and then stitching the frames together at the end. That’s it!
If you’ve actually bothered to follow these steps and make a demo then please feel free to send it my way - I’d love to see it!
There are also some interesting follow up ideas which you (or future me!?) might consider playing with. For example, edge-detection filtering could be used to find salient edges (essentially as regions of interest) which can then be slightly offset and contrast reversed… like local four-stroke apparent motion sequences within an image. That might be a cool way of making stationary images appear to move in interesting ways? And may make the image look slightly less 🤮-inducing (since you might not have to contrast reverse everything?). Who knows…
If you’re reading this and have been bothered to implement that, then I guess you now know… so please enlighten me!
Update (7/1/2024): Future me was actually bothered!
I decided to quickly implement a rough version of the idea I had above, using a simple Sobel filter for edge detection. I think the results are pretty cool! Here are two examples using William Turner’s (not me, nor the pirate… the other one) painting ‘The Shipwreck’ and Hokusai’s ‘The Great Wave off Kanagawa’ (then code below).
Pretty cool effects in my opinion! Here’s the code I whipped up:
import numpy as np
import matplotlib.pyplot as plt
from scipy.signal import convolve2d
import cv2
import imageio
import os

def edge_detection(image, filter):
    x = convolve2d(image[:,:,0], filter)
    y = convolve2d(image[:,:,0], np.flip(filter.T, axis=0))
    edges = np.sqrt(np.square(x) + np.square(y))
    edges *= 255.0 / edges.max()

    return edges

def mask_image(edge_image, rep, offset = False, direction = 0):

    if offset:
        edge_image = np.concatenate(
            (np.zeros((offset, edge_image.shape[1])), edge_image[offset:, :]),axis=0
            )
        edge_image = np.concatenate(
            (np.zeros((edge_image.shape[0], offset)), edge_image[:, :-offset]),axis=1
            )

    mask_image = np.ma.masked_where(edge_image < 50, 255 * np.ones_like(edge_image))

    return mask_image

def plot_image(image, mask, color_map, saving, i, filenames):
    fig, ax = plt.subplots(figsize=(30, 30))

    ax.imshow(image[...,::-1])
    # ax.imshow(image[:, :, 0], cmap=color_map, alpha=0.2)
    ax.imshow(mask, cmap=color_map, interpolation='none', vmin=0, vmax=255)
    ax.axis('off')

    if saving:
        filename = f'{i}.png'
        filenames.append(filename)
        fig.savefig(filename)
        plt.close()
        i += 1

    return i, filename

def build_gif(filenames):
    with imageio.get_writer('hokusai.gif', mode='I', duration=0.09) as writer:
        for filename in filenames:
            image = imageio.imread(filename)
            writer.append_data(image)

    for filename in set(filenames):
        os.remove(filename)

filter = np.array([[-1, 0, 1], [-2, 0, 2], [-1, 0, 1]]) # simple sobel filter

image = cv2.imread("hokusai.jpeg")
edges = edge_detection(image, filter)

i = 0
filenames = []
for rep, color in enumerate(['Greys', 'Greys_r']):
        mask = mask_image(edges, rep)
        i, filename = plot_image(image, mask, color, True, i, filenames)

        mask = mask_image(edges, rep, offset=3)
        i, filename = plot_image(image, mask, color, True, i, filenames)

build_gif(filenames)
There are lots of parameters to be played with, and no doubt many improvements to be made, but here’s the essential logic. Basically: 1) I use Sobel filter to find the salient edges within the image, 2) I create a mask of those edges, 3) I plot the mask over the original image four times following the typical four-stroke apparent motion logic (having a sequential offset of the mask, which is then repeated with a luminance inversion). You can also toggle on and off having an additional partially transparent greyscale overlay of the image which switches luminance… this seems to make the motion effect stronger, but also adds even more annoying flicker, so I commented it out for the demos above.